The DIY & Crafts Blog
Stylish Wooden Coffee Tables You Can DIY
Crafting a Centrepiece for Your Living Room
A well-designed coffee table can be the centrepiece of any living room, blending both function and form. For DIY enthusiasts, creating your own wooden coffee table isn’t just a chance to add a personal touch to your space — it’s a rewarding project that hones your woodworking skills while also saving money. Whether you’re a novice woodworker or a seasoned DIYer, this guide will walk you through how to build stunning wooden coffee tables that marry style with simplicity.
With the surge in interest in sustainable and handcrafted home decor, more people are embracing DIY wooden furniture as a means of self-expression and practical creativity. Wooden coffee tables, in particular, offer endless customisation potential — from minimalist Scandinavian designs to rustic farmhouse styles.
In this post, we’ll explore stylish, functional, and achievable DIY coffee table projects, share expert tips, and offer design inspiration to help you get started. Let’s turn that pile of timber into your next favourite furniture piece.
Choosing the Right Style for Your Space
Understand Your Interior Aesthetic
Before picking up a single tool, it’s essential to identify the style that complements your existing decor. Common DIY coffee table styles include:
- Modern Minimalist: Clean lines, neutral finishes, simple geometry.
- Rustic/Farmhouse: Reclaimed wood, distressed textures, sturdy build.
- Industrial: A mix of metal and wood, exposed hardware.
- Mid-Century Modern: Tapered legs, walnut tones, low-profile builds.
Consider Size and Function
- Measure the space to ensure proper fit and flow.
- Consider the height — the standard coffee table height is 40-45cm.
- Do you need storage (e.g. shelves or drawers), or is it purely decorative?
Essential Tools and Materials
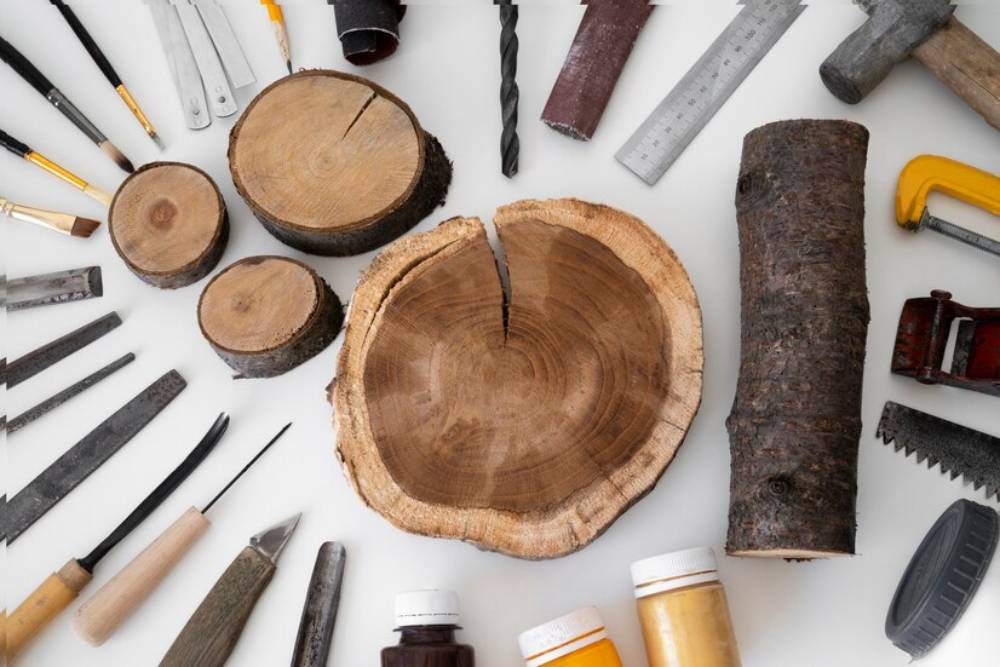
Basic Tool Kit
If you’re a beginner, don’t worry — many of these tools are affordable and easy to use:
- Tape measure
- Circular saw or mitre saw
- Drill and drill bits
- Sander or sanding block
- Wood glue and clamps
- Wood screws or pocket hole jig
- Finish (stain, paint, varnish)
Wood Selection Tips
Different wood types yield different aesthetics and levels of difficulty:
- Pine: Inexpensive and easy to work with, but dents easily.
- Oak: Durable and rich in grain — a classic choice.
- Walnut: More expensive but luxurious in tone and feel.
- Reclaimed wood: Eco-friendly and full of character.
DIY Coffee Table Project Ideas

1. Minimalist Scandinavian-Inspired Coffee Table
Skill Level: Beginner Time: One weekend
Materials:
- Pine boards
- Table legs (can be hairpin or tapered wooden legs)
- Wood glue and screws
- Clear satin varnish
Steps:
- Cut the boards to the desired tabletop size (e.g., 100x50cm).
- Attach the legs securely using screws and corner brackets.
- Sand all surfaces and round off edges for a smooth finish.
- Apply varnish to highlight the wood grain.
Why It Works: Its clean lines and light wood tones complement a modern, airy home interior.
2. Rustic Pallet Coffee Table
Skill Level: Beginner to Intermediate Time: 1-2 days
Materials:
- Reclaimed wood or pallets
- Casters (for mobility)
- Screws and nails
- Wood stain
Steps:
- Disassemble pallets and sand each piece thoroughly.
- Create a rectangular frame and attach slats across the top.
- Add a lower shelf for storage (optional).
- Attach casters to the bottom.
- Stain or seal for a weathered look.
Why It Works: Perfect for rustic, farmhouse, or industrial interiors. Budget-friendly and environmentally conscious.
3. Mid-Century Modern Table with Storage
Skill Level: Intermediate Time: Weekend project
Materials:
- Hardwood plywood or walnut boards
- Tapered table legs
- Pocket hole jig
- Varnish
Steps:
- Construct a rectangular box with an open shelf or drawer.
- Use a pocket hole jig for strong, hidden joints.
- Sand thoroughly and finish with varnish.
- Screw in tapered legs at an outward angle.
Why It Works: Stylish and functional, this design adds retro charm and practicality.
4. Epoxy Resin River Table
Skill Level: Advanced Time: Several days (due to resin curing)
Materials:
- Live edge wood slabs
- Epoxy resin and pigment
- Moulds and clamps
- Sandpaper (various grits)
Steps:
- Create a mould for your tabletop.
- Place slabs in the mould and pour pigmented resin in between.
- Allow the resin to cure fully (can take 48+ hours).
- Remove from mould and sand to a glossy finish.
- Attach sturdy legs.
Why It Works: The resin adds a striking, artistic element. Ideal as a conversation piece.
5. Folding Outdoor Coffee Table
Skill Level: Intermediate Time: 4-6 hours
Materials:
- Exterior-grade wood
- Hinges
- Outdoor sealant
Steps:
- Build a slatted top and foldable leg supports.
- Sand and round-off corners.
- Apply waterproof outdoor finish.
Why It Works: Versatile and portable, great for balconies and garden patios.
Tips for Finishing Your Table
Sanding Like a Pro
- Start with 80-grit, and finish with 220-grit for a smooth surface.
- Always sand with the grain to avoid scratches.
Choosing the Right Finish
- Stain enhances the wood grain and adds colour.
- Paint gives a bold, solid finish — ideal for modern styles.
- Clear coat (polyurethane or varnish) protects the wood and enhances durability.
Avoiding Common Mistakes
- Measure twice and cut once.
- Don’t rush the finish — allow for proper drying and curing.
- Always test stains or paints on scrap wood first.
Budgeting and Sourcing Materials
Save Without Sacrificing Quality
- Check local timber yards or salvage stores.
- Reuse materials from old furniture.
- Buy hardware in multi-packs for future projects.
Online vs Local Shopping
- Local shops allow you to inspect wood grain and quality.
- Online retailers often have better pricing and variety.
Inspiring Real-World Examples
Community Creations
- Join online forums or Reddit threads (e.g. r/woodworking) to see user-submitted projects.
- Look for inspiration on Pinterest and Instagram.
Showcase Your Work
- Take before-and-after photos.
- Share your progress on social media.
- Consider joining local maker fairs or craft shows.
Conclusion: Start Building Your Masterpiece
Building your own DIY wooden coffee table is more than just a weekend task — it’s a way to express creativity, learn new skills, and create something truly unique for your home. Whether you prefer sleek modern lines or rustic charm, the possibilities are endless when you combine inspiration with elbow grease.
Remember, woodworking doesn’t demand perfection. Embrace the imperfections — they’re what make handmade pieces stand out. Take your time, enjoy the process, and don’t be afraid to experiment with new styles or techniques.
So, grab your tools, pick your favourite design from above, and get started on creating a centrepiece your home will love.
Ready to build your first table? Share your results with us or tag your project photos with #WoodcraftWeekend on social media. Let’s build something beautiful together!


YOU MAY LIKE


